Affichage des articles dont le libellé est fly tying. Afficher tous les articles

mercredi 13 avril 2016

Spring is coming...

After the first real fishing outing last week that has  left me a pleasant memory it seems that spring is on the way; temperatures begin to rise and the wind is less present.
I have had very few moments to be on any stream but a few days ago as I was driving nearby a stream I did stop for a few casts on a spot that I had not visited for ages. What was not my surprise to take this big rainbow! Very beautiful, with fins in perfect condition there is no doubt whether a trout have been introduced into this stream and that has managed to survive the herons, fishermen, etc. 
Even though it was cool to land this big fish I would have preferred it to be an atlantic salmo trutta fario. 


With spring animals, just like fishermen, are much more active and that offers me the opportuniy to do some photography. It gives me the will to become a little more familiar with the Canon EOS 1200D camera I purchased last winter and which has almost not been used yet.


The early morning is the best time of day to watch all this wildlife that often lives a few steps, or something a few tens of yards, away from us. 


I recently made new editions of my kebari tying videos,  I make them so that they are understandable to everyone, especially novices so hopefully it will meet their expectations about this topic. Fly tying is not complicated or mysterious, it's just a matter of training.


mercredi 30 mars 2016

ZENMAI-DOU

The last weekend has not been devoted to tenkara fishing because of a violent weather event so I did spend a little bit of time with other activities related to my passion; I started reading an awesome book about which I shall publish something later, and I finally realized a tying video of one of my favorite kebari pattern: the Zenmai-dou.


I posted on this blog in July 2014 a detailed fly-tying sheet and some readers asked me if one day I would make a fly tying video of the zenmai-dou... This is now done!


I hope that you will like this home made video and perhaps will you want to try this kebari as in a tenkara fishing experience it is good, and even advised, to walk off the beaten path.
It is always a pleasure for me to promote these traditional patterns that are the result of a long evolution in the perspective to keep it simple and effective.


dimanche 19 avril 2015

Kiji Kebari

Since I have started tenkara I have rediscovered the pleasure of tying beautiful and effective fishing flies with simple and natural materials. In the last three years I have created only one sakasa kebari pattern using some synthetic dubbing. And I have not fished with it at all during the two last seasons!
My favorite feathers are cock neck and saddle, partridge flank, hen pheasant wing. These materials have proven to make beautiful and effective kebari.
Lately I have been looking for good quality ringneck pheasant feathers, "church windows" to be more precise but I have realized that most of what I did purchase was low quality. Even though those feathers are not expensive I do not like binning half of a feathers bag. As my grandfather used to say: "Cheap is often too expensive".
If any of you wonders why these feathers are called "church windows" I think that the picture below will give you the answer.


Now I have found a reliable supplier for these feathers I finally can post something about the tying of a nice and effective kebari whose name simply means "pheasant fly". Fly tying is easy, it is only a matter of training. Trouts do not care if the bug they bite has been tied by an expert or a newbie!


The kiji kebari is a wet fly pattern to be tied on heavy wire hooks like the Owner Kuawahara Tenkara, the body is made of 6/0 tying thread. I use thread of this size to made the tying faster and the fly stronger. 


Perhaps will you find this video useful.


lundi 30 mars 2015

My REGAL Medallion vise

After many years of loyal services I have decided to not use my Dyna King vise, a Barracuda Trekker Junior model, anymore. Since I spend a lot of time behind the vise tying the kebari that I sell in my own webshop this vise has proven to offer a too low working position. This vise has many good points such as the complete stainless steel construction, rotary function on super smooth ball bearings, stability, very strong jaws that are also very easy to change but I spend a full day working on it I systematically feel a neck hache because of working in a wrong position.
I had long wanted a Regal vise because the head positioning has a very large amplitude (220° up or down) unfortunately these great tools are poorly distributed in Europe and are often sold at ridiculously high prices. After research on the net I did find a fly shop that offered the almost complete range of Regal products at reasonable prices and my choice was the flagship of this collection: the Medallion traditional head.


After a week of wait I finally had the parcel in my hands! I opened it, the vise was lying  in a very simple carton box waiting to be assembled and take action. It was fortunate that I did receive the vise this day because I had to tie a lot of kebari for a customer in Belgium. 


One of the specifications that made me choose a Regal vise is the fact that the jaws are actioned by a lever and not a rotating cam which means that I will never have to care with jaws settings prior tying kebari on the vise. These jaws are designed to hold hooks from size 22 to 1/0 and that covers even more than my needs. 
The hook tightening in the jaws is incredible and I sacrificed a few hooks that ware taken in them. Most of did bend but the part of the hooks taken between the jaws did not move at all. 


The vise stem has the swivel shaft clamp knob that can be positioned at the height chosen by the user. That is the feature that made choose a Regal vise. The necessary tool to set up the swivel shaft is included in the box. I finally have a vise on which I can work without having to lower the head. My cervical vertebraes warmly thank the Regal vises team!


Regal offers no less than seven types of bases for their vises, three clamps and four pedestals. I have chosen the Traditional bronze pedestal that most of us have probably already seen because it is a very famous model. It is superb! I can not find another word to describe this beautiful object. 
The underside of the base is covered with a cork plate. It does not slide at all whatever is the material of the table where you may use the vise. It is pretty heavy (3,7 lbs) and very stable. 


The box in which comes the vise contains two bolts, one is to secure the vise stem on the base and the other one goes under the head and according how it is tightened it will make the head rotary or fixed.
When I did open the box I was a bit surprised by the size of these bolts. They are really huge compared to the ones of my Dyna King! Their diameter is 24 mm and this really eases the use. I am sure that a Regal vise is designed to be assembled blindfolded. 

Regal Vises offer of course a lifetime warranty and the booklet included in the box contains very clear use and care instructions to keep this great tool in perfect conditions. I have only owned  this vise for two weeks but it has already proven me to be the best choice. Don't we say "A good worker always has good tools"?


dimanche 15 février 2015

Kujaku Ken-bari

I had planned to go for a hike yesterday to check some creeks where I will perhaps fish next month but because of the wind and rain I finally spent the day browsing my tenkara library and I did find by chance, which sometimes make good things happen, in an old issue of Headwater Magazine on a picture of a traditional tenkara pattern. This kebari inspired me and reminded me of a recent exchange with Anthony Naples about traditional fly patterns and regionality.

The name of this kebari is pretty simple and means "peacock fly".
As there are more and more people new to tenkara and fly-tying I decided not to keep this pattern for my self and to share a step by step tying sheet.

1-Fix in your vise a VMC 9408 size 8 hook and wrap the tying thread around the shank.


2- Select 15mm of natural silk thread, fold it in two equal parts and fix it on the hook with wraps of         tying thread.


3- Here is the result you will have: 


4- Build a tapered underbody with tight wraps of tying thread. 


5- Select three fibers on a peacock saber.


6- Fix these fibers on the hook with the thread then trim the excess.


7- Select three peacock herls and fix them to the hook with tight wraps of tying threads.


8- Twist the peacock herls around the tying thread. This will solidify the body of the kebari.


9- Turn the twisted peacock herls around the hook shank, stop it with the tying thread and trim the           excess of peacock herls.


10- Select a cock neck hackle feather and fix it with the tying thread on the hook. 


11- Make two turns with the hackle feather around the hook shank and stop it with tight wraps of           tying thread. Trim the excess.


12- Make a few turns of tying thread to get a neat head to your kebari then use a whip finish to block    the tying thread. Then cast thread off. Secure with glue if you will. 


I sincerely hope this detailed tying sheet will make you want to tie a few of these traditional patterns and have fun fishing with them.


mercredi 4 février 2015

Kenbane kebari variant

When I go fishing, may it be for two hours or a full day, I always carry a ziploc plastic bag in which I collect materials I find on the walk to the stream or on the river's edge.
The next trout season will start in six weeks now and as I was tyding my fly tying stuff this morning I did find back the bag and opening it the first thing that I got in hand was a blackbird wing. Even though the trout season is coming soon I am not caught in a fly tying craze but this small feathers inspired me to tie a Kenbane kebari variant.


As you have probably understood if you follow this blog I am an avid traditional ties enthusiast and it did not long to decide to use these feathers to tie a variant of the Kenbane kebari. The original pattern
is tied using pheasant for the hackle but I am running out of it today. 


The process is not complicated at all. To start I crush the feather stem with the butt of a boxcutter.


The next step to clean the inside of the half stem with a bodkin. Be careful to do it gently not to pierce it because it would make the material very fragile. 


The tying has nothing particular besides the feather's preparation. I used a Tiemco 100 size 14 hook on which I tied zenmai, a fine golden wire, blackbird feather with a burnt orange 6/0 thread. 
I like more and more slowly tying a small quantity of kebari. For my personal use I rarely tie more than three or four at each session now. I am not interested by productivity anymore, I enjoy the simple pleasure of craft in harmony with my tenkara.


As I am looking at these Kenbane kebari I think that today I could sum up my tenkara by a statement such as "Built to fish". Like many fly fishermen I have long been attached to aesthetic details but now I have realized that the fact of judging the fishing capacities of a fly pattern based on aesthetic is a complete nonsense. A fish eye is not a human eye, a dry and immobile pattern on a fly tying desk is not a drifting insect and I do not think that a trout has even the slightest idea of what is a kebari. 
How do you think trouts look at you?

samedi 27 décembre 2014

CHENILLE KEBARI


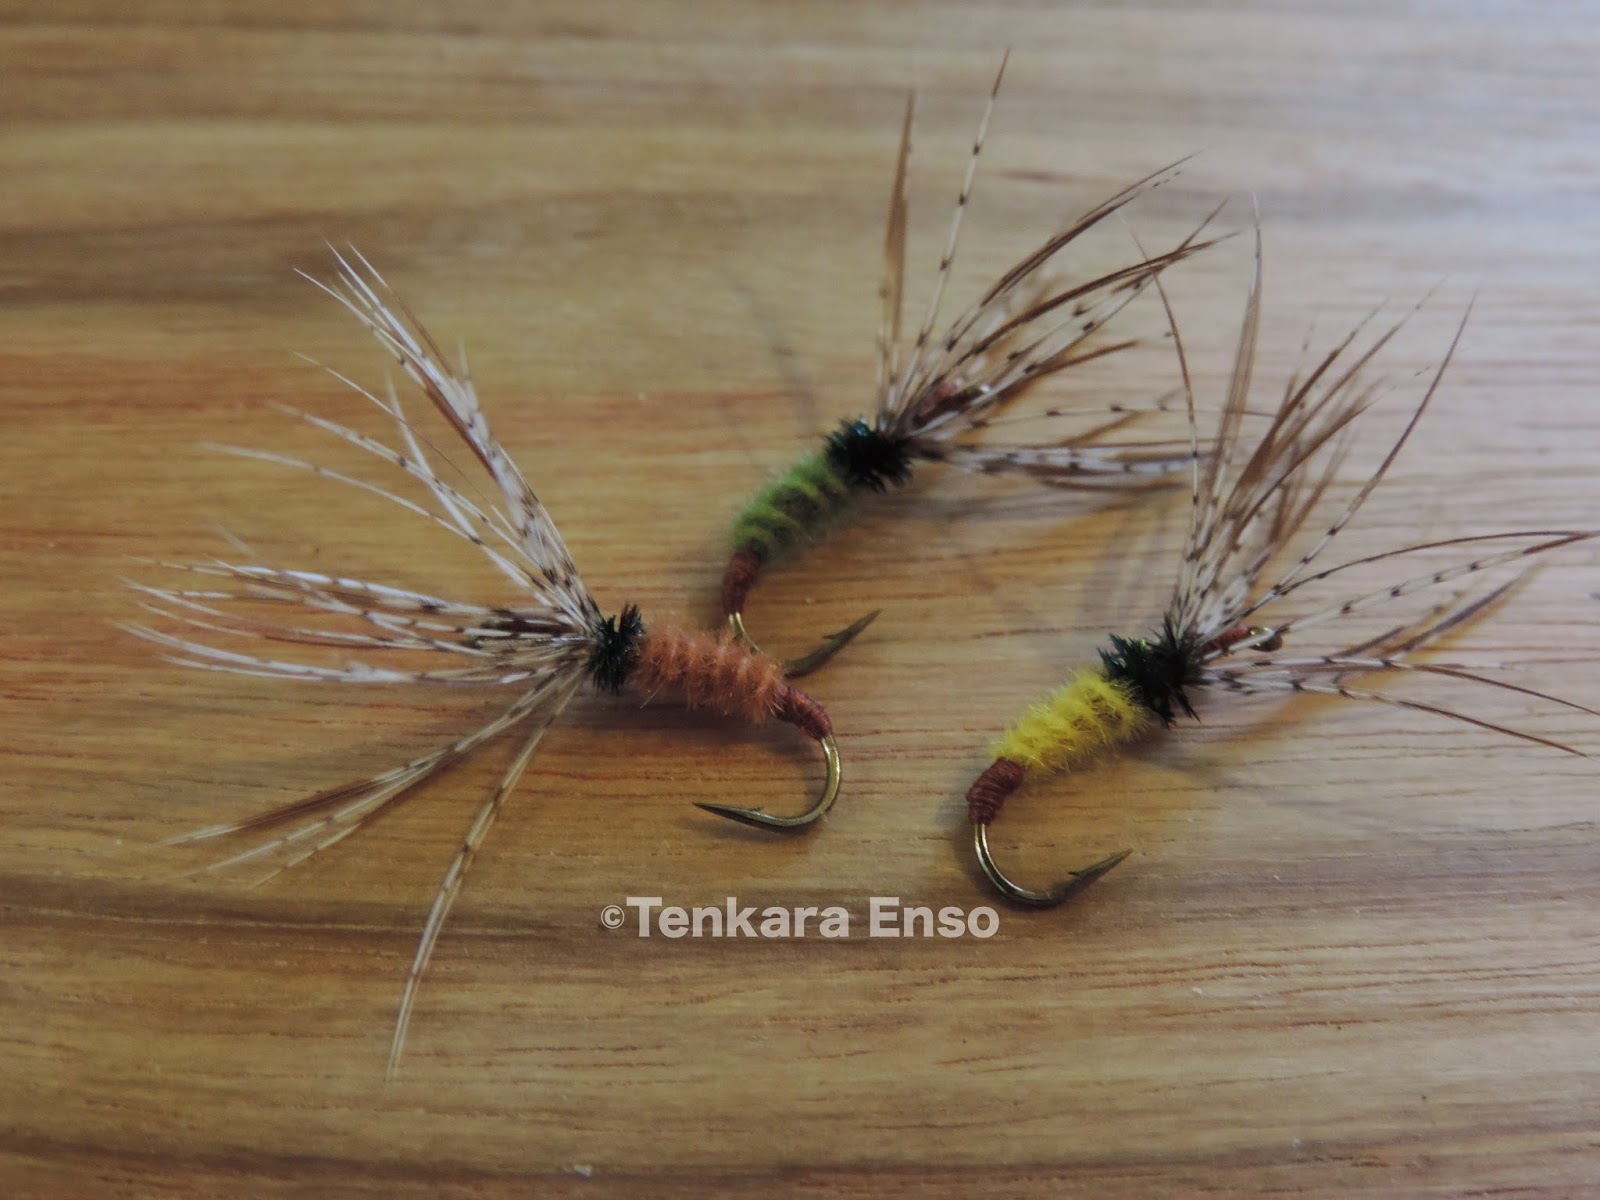
Continuing the sort of the fly tying materials I have accumulated over the years I have found back some chenille I thought I had exhausted long ago. An opportunity for a new fly tying sheet!

1) Fix a Tiemco 3769 size 10 hook in your vise and wrap the tying thread dehind the eye to make           your kebari a neat head.


2) Select a partridge flank feather, remove the fluff then stroke the fibers against the grain. Catch the feather by the tip with tight wraps of tying threads then trim the excess above the eye.


3)  Take hold of the feather in vertical position and gently bend the fibers forward.


4) Wind the partridge feather around the shank and keep all the fibers facing forward after every             turn then catch it in with tight wraps of tying thread. Trim the excess of bare stem.


5) Catch in a peacock herl behind the partridge hackle and wrap it around the tying thread. This               simple tip will make the peacock herl thorax stronger.


6) Wrap the peacock herl around the shank to make your kebari a thorax then catch it in with the             thread and trim the excess. Do not forget to unwrap the peacock herl from the tying thread before       cutting off. 


7) Catch in some chenille by tight wraps of tying thread and trim the excess. 


8) Wind the chenille around the shank then catch it in by wraps of tying thread and trim the excess.         Finish your kebari with half hitches then cast off the tying thread. 


Your chenille kebari is finished!


jeudi 18 décembre 2014

CELEBRITY DEATH MATCH: C&F DESIGN Vs STONFO

There are on the current fly tying markets hundreds of tools but most of what is offered is of poor quality, imported from Asia at low prices and sold in hundreds of shops under different names. I will not waste a line here to write my opinion about these fly shops policies.
I have always been told that "a good worker always has good tools" and that is probably why I always try to be an intelligent customer favoring quality over quantity. 
Tying flies does not necessitate a lot of tools so I think it is better to work with a few premium tools than collecting unusable or unreliable ones. 

I own two different hackle pliers but I think that the time has come to keep only the best of them. 


The older hackle plier of mine is the Stonfo P.M that I did purchase a few years ago to replace an antique hackle plier that was so relaxed it could even not keep closed. 
The plier is made of steel which is not of good quality and it has traces of oxidation; it still can pinch feathers stems but there is some rubber coating on only one of the two jaws and this makes this hackle plier almost barely usable for midge feathers whose stems is super thin. The spring which is supposed to ensure the constant tension of the feather when it is wrapped around the hook shank has unfortunately relaxed too much. It is, to me, one more fault of this tool: because of the weak spring I have to remove the trim bag from my vise to use the hackle plier. I do not use it anymore. It is sold around 9 euros, it is not a bad tool but it is not a long-term investment. 
Being unsatisfied by this one I decided to invest about 20 dollars in a C&F Design hackle plier because I had already experienced their excellent bobbin holders and I was sure not to be disappointed with the CFT 120M.
This model was designed to work small feathers for small flies (The M in CFT 120M is for Midge) and even though I do not tie a lot of midge kebari I did chose this product because of its small size that allows me to keep my tim bag in place. 
The tip is really narrow and slightly curved outward and that detail makes the difference with straight jaws: one can pinch super thin feathers stems without cutting it. Instead of a metal spring like most of hackle pliers the CFT 120M has its two parts linked by a rubber band that extends up to two millimeters. It really minimizes the risk of feathers breakage. The C&F Design tool is shorter than the Stonfo, 65 mm against 95 mm, it is made of high materials so it will work perfectly for long years. 
The CFT 120M is a little bit more expensive than the Stonfo but its price is justified by its perfect functionality and the very high quality of the materials used to produce this awesome tool. 


lundi 15 décembre 2014

TAKAYAMA SAKASA KEBARI VARIANT

TAKAYAMA SAKASA KEBARI VARIANT

A few days ago I was lucky enough to chat with a old fisherman of my area and I was really pleased to note that he did share my pragmatic approach to fly tying and agreed with me that real fishing flies had not been designed by the fly tying materials industry neither the fly tying celebrities who mainly tie showcase flies but by anonymous tiers who tied their flies with the materials that they could find easily around them. I think that it was the same everywhere in the world before fly fishing became an industry and Japan was probably not an exception.

When I go fishing I always carry a ziplock plastic bag that I use to collect all kinds of furs and feathers, I did not start this habit. My grand father and father already did the same decades ago. The fly tying stuff they ever bought were hooks.
I still have to wait several months to go back fishing in streams, like many European people, so I start getting ready for the next trout season. The time to open my material collecting bag has come and today I did take guinea fowl feathers.

The tie I propose you today is a variant of the famous Takayama sakasa kebari and my goal with this fly tying sheet is to make you add a ziplock bag to your tenkara gear!

1) Having fixed a Owner Kuwahara (size 3) hook in your vise, wind the 8/0 tying thread around the shank to make a neat head to your kebari. Cast off excess thread.


2) Select a guinea fowl feather and prepare it by removing the fluff from the stem then stroke the fibers against the grain. 


3) Catch in the feather tip with tight wraps of tying thread than trim the excess. 


4) Take hold of the feather with a pair of hackle pliers and maintain the feather in vertical position.         Gently bend the feather fibers towards the hook eye. 


5) Wind the feather around the shank and make sure all the fibers are facing forward after every turn.
    Catch in the feather stem with tight wraps of tying threads then trim the excess.


6) Behind the guinea fowl hackle catch in a peacock herl and wind it around the shank. Do three or         four turns as you prefer then secure the herl with tying thread thread and trim the excess of herl. 


7) Build a body to your keabri by tight wraps of tying thread. When the body has the shape you like secure the tying thread with three half hitches and cast off thread.


Your kebari is finished and ready to go fishing!